This cake I was introduced to earlier in the summer, while visiting my hubby's cousin, Ema. I like to think of her as my cousin too now. I love her, she is an awesome person. Everybody in the family was excited for her barbecue party, but not as much for the barbecue itself but more about this scrumptious cake she makes. And you can imagine I got very excited about this, all our cousins were raving about it, and as soon as we got there we dug in, before having any actual food, even some of us breaking all strict diets and all, and ate half of the cake in a heartbeat. Then we ate an array or various grilled meats, sides and salads, all delicious, and yes, we finished everything with the other half of the cake. It was an awesome evening!
And of course I asked her for the recipe and the permission to share it here on Askanam. She is a total sweetheart, and agreed.
Back home we call this type of cake a brownie, although it has nothing much in common with the American brownie. My Mom also makes this type of cake, but Ema had changed and improved the recipe over the years, as she has been making this since her school years, and the results are great to say the least. Well I must say I added my own touch to it, errrr, just by doubling the quantity of chocolate sauce, haha. Because well, you can never have to much chocolate, right?
Ingredients for a 9x13 inch pan, around 40 servings (yes, portion size is very small, as the cake is very rich, but of course, you eat as many as you want or can... that means a lot more than 1 for us):
For the cake:
7 large eggs, separated
1 cup granulated sugar
7 tablespoons vegetable oil (sunflower, canola or corn)
1 1/2 cups all purpose flour
1 teaspoon baking powder (optional, works just as fine without)
1 small pinch of salt
1 tablespoon pure vanilla bean paste or extract
For the frosting:
6 egg whites
1 1/2 cups granulated sugar
1 teaspoon vinegar (optional)
2 tablespoon corn starch (optional)
For the sauce:
6 egg yolks
1 1/2 cups granulated sugar
2 stick of butter, softened preferably
1 cup of milk
2/3 cup good quality cocoa powder
1 tablespoon pure vanilla extract
Method:
First, make the cake.
Prepare a 9x13 inch baking pan lined with parchment paper, and preheat oven to 350 degrees F (180 C).
Separate the egg whites from yolks, putting the whites in the clean bowl of your mixer, fitted with the whip attachment, and the yolks in the bowl of a small food processor, blender or just a medium bowl.
Start beating the egg whites on lowest speed for 20-30 seconds. Increase the speed to high, and beat for 1-2 minutes until soft peaks. Add a pinch of salt. With the mixer still on high speed add the sugar gradually, and beat until stiff glossy peaks form, another 2 minutes or so. This times are for a KitchenAid stand mixer, it might take a little longer time if you use a hand held mixer, that is not as powerful.
Blend/process or beat with a fork or whisk the egg yolks and vegetable oil very well, until thick and lighter in color. Mix in the vanilla.
Add the egg yolk mixture over the egg whites (meringue) and mix/fold in gently with a wooden spoon.
Sift on top of it the flour and baking powder, and fold in gently just until incorporated. Do not over mix.
Pour the batter in the pan, level with an offset spatula, and bake for 23 minutes, on the middle rack. Check after 20 minutes, by gently pressing with the finger on top. If the cake springs back it is done, so you can take it out of the oven. Don't over bake the cake, as it will dry out, and you will place it again in the oven later. It is better to be under baked actually. But not as much as it to deflate when you take it out. Keep a close watch on it, and take it out as soon as it sets.
After the cake is done,take it out on a heat proof surface, and let the oven on, increasing the temperature to 380 degrees F.
While the cake bakes, make the topping.
Wash and dry the mixer bowl and whip. Repeat the same process with the egg whites as you did for the cake. When the meringue is stiff and glossy sift over the corn starch, add the vinegar and gently mix.
Pour the meringue over the cake, level it well with an offset spatula, return pan to oven and bake at 380 F for 15 minutes, until the top is golden and crisp. You can put the meringue on the hot, just out of the oven cake.
Let the cake cool down completely on a rack, in the pan. When cool using a sharp knife cut it in small, 1 inch squares.
Make the chocolate sauce.
In a sauce pan mix well together the cocoa powder and sugar, so there are no cocoa lumps. Add the milk and butter, mix, and place on medium heat, mixing constantly. Get to a boil, and let it cook for 1 minute.
In a medium bowl beat the egg yolks with 2-3 tablespoons of sugar. When the cocoa has boiled, take it off heat. Add one tablespoon of the hot mixture and add it to the yolks, mixing very well. Do this for several times, increasing to 2,3, 4 tablespoons of hot mixture you add every time, mixing well after each addition. This is in order to temper the eggs, so you don't get scrambled eggs. When the bowl is almost fool, return it's contents to the rest of cocoa mixture in the sauce pan, and mix well everything. The sauce should be glossy, thicker and delicious. Add the vanilla and mix.
With a spoon, pour hot chocolate sauce on each cold cake square. Or just pour it over, but slowly. The cake should be "swimming" in chocolate sauce. It is best to make the cake few hours in advance, so it has time to soak up the sauce. It keeps well for 2-3 days, in a cool dry place. I keep it in the oven after it cools.
Now stop thinking about calories, and eat!
Thank you, Ema!
Our cousin E has an amazing "blondie" recipe that she was so kind and shared with me, and I plan sharing with you on this blog soon! But until then I used part of that delicious recipe and experimented with some cupcakes today.
These are fluffy and light as air, filled with fresh apricots, as they are in full season, and frosted with a velvety meringue. The apricots bake inside the cupcake and transform in this creamy delicious filling. I believe it is a perfect combination between the sweetness of the cake, tartness of the apricots and creaminess of the meringue.
Ingredients (for 12 cupcakes):
3 eggs, separated
1/2 cup granulated sugar
3 tablespoons vegetable oil (sunflower or canola)
1 1/4 cup all purpose flour
1/2 teaspoon baking powder
1 small pinch of salt
1 tablespoon pure vanilla extract ( you can use one teaspoon, I love vanilla and tend to exaggerate )
6 ripe fresh apricots, pitted, cut in half.
Preheat oven to 350 degrees F (180 C)
Line your cupcake pan with your favorite cupcake liners.
Method:
1. Separate the eggs, putting the egg whites in the clean (wipe the bowl with a paper towel and lemon juice or vinegar to remove any fat traces) bowl of your electric mixer (don't use plastic bowls, use glass, stainless steel, copper or ceramic ones) and the egg yolks in another bowl.
2. Start beating the egg whites, on low for 30 seconds, then on medium-high for about 3-4 minutes, or until soft peaks form.
3. Gradually add the sugar, and beat another 2 minutes or so, until it gets stiff and glossy.
4. Whisk the egg yolks with the vegetable oil well, then add to this the vanilla extract and mix.
5. Add the egg yolk mixture over the beaten egg whites, and using a spatula or wooden spoon fold in, slowly.
6. Sift over the eggs the flour, salt and baking powder. Fold in carefully, just until combined.
The batter should be fluffy but not runny, should keep it's shape, like in the photo bellow.
7. With the help of an ice cream scoop or spoon, fill the cupcake liners with the batter, up to half of the height.
8. Place over the batter half of apricot
9. Cover the apricot with another spoon of batter. In the end the cupcakes should be filled up to two thirds.
10. Bake cupcakes on the middle rack of the oven for 17-20 minutes, depending on your oven, until puffed up and golden on top.
11. Carefully take the pan out of the oven, and let the cupcakes cool on a cooling rack.
Make the meringue frosting:
Ingredients:
1 cup egg whites (egg whites from 4-5 eggs)
1 cup granulated sugar
1 teaspoon pure vanilla extract (I use Tahitian vanilla extract for this)
1 teaspoon lemon juice or almond extract (you can also skip this all together)
Gel food coloring of your choice (I used Americolor soft gel food coloring in color Peach, 3 tiny drops)
Method:
1. Put a medium sauce pan with some water on heat to get to a simmer.
2. In the clean bowl of your mixer add the egg whites and sugar, and place the bowl over the simmering pot, taking care that it does not touch the water and fits snugly.
3. With a clean hand whisk beat slowly but constantly, until the sugar is completely dissolved, and the mixture is hot to the touch. It should take 5-7 minutes. To be more precise use a candy thermometer, and take them off the heat when they reach 140 degrees F.
4. Place the bowl on the mixer,after wiping the bottom dry and using the whisk attachment beat them on medium speed until soft peaks form, and the bowl cools down. You can also do this by hand, it does not take too long.
5. Add the lemon juice (or almond extract if you wish), vanilla extract and food coloring. Careful to add the food coloring drop by drop, not too much at once, to make sure you get the desired hue. If you want a deeper color you can always add more later. The food coloring is pretty strong, and very little is needed. Beat everything on medium high for couple more minutes, until glossy and stiff peaks form. It is important not to over beat it, as it will start to look grainy, and will be hard to pipe and of course not look as good.
6. Fill a piping bag fitted with a tip of your choice, with the meringue, making sure there are no air bubble left. This is kind of tricky, but it is worth taking care of if you want the frosting to look as perfect as possible. I used a big simple round piping tip to achieve this classic look.
This meringue frosting is best used immediately, so be sure to start making it right before you will use it. Also it is best eaten the same day, as it does not keep well. (maybe one night in the fridge won't ruin it though, but it won't be as good). The best part of this frosting is that it is pure white, and it makes so much easier coloring it in pale pastel hues, and the colors stay true. It is also very easy to handle and frost/pipe it on your desserts.
To make my cupcakes fabulous I decorated them with edible golden stars.
So, what do you think?
Fourth of July baking took over my kitchen, and so I also made this cute little cupcakes. What is special about them is a hidden white star you find inside them when cut. It is so unexpected, pretty and festive! Perfect to take to a 4th of July barbecue.
To make the cupcakes I used the same white cake recipe as for the Fourth of July Cake. Make one recipe of the cake, and bake it in a sheet pan lined with parchment paper, at 325 degrees F, for 20 minutes. Let it cool to room temperature, then pop it in the freezer for at least 30 minutes.
Freezing the cake sheet will make it much easier to cut and then stand in the cupcake pan.
Prepare your cupcake pan, using your favorite cupcake liners.
Preheat oven at 325 degrees F.
Prepare another recipe of the white cake, tinting it at the end with blue gel food coloring, or any other color you wan to use, just make sure the stars and the other batter have different colors.

With a 2-2.5 inch star shaped cookie cutter, cut out stars out of the chilled cake sheet.
Place a star, standing on two of it's five little feet, in the center of each cupcake liner, and make you sure you put all of them on the same line, so that you will remember where the stars are facing. This is important. I like to put them paralel to the pan's edge.
Using a spoon, carefully spoon blue/colored batter in front, and back of the star, so that it is helps it stand. If you just pour the batter on top you risk the star to fall, and it won't stand strait. Keep adding batter in the cupcake liner, up to 2/3 of it's height, as you would normally do for regular cupcakes. Carefully place the pan in the preheated oven, and bake for 20 minutes. Check them with a toothpick to make sure they are done.
Let them cool on a wire rack in the pan.
Take a small sharp knife and make small superficial cuts on top of the cupcakes, all the way across, till the paper, on the same line as the stars inside, so after you take the cupcakes out of the pan, you will be able to see exactly what way the stars are oriented. The cut won't be obvious unless you look carefully.
Prepare your favorite cupcake frosting recipe. I used Swiss meringue buttercream on some , and cream cheese frosting on others. (left overs from the cake :) )
Frost the cupcakes to your liking, but remember not to cover the cut near the paper liner, so you can still see the sign you made, and so you can cut them when serving, to make the stars show up!
You can use this technique for making many fun cupcakes. You could make pink hearts inside of Valentine's Day cupcakes for example!
I was really excited to try making my first Fourth of July "Independence Day" cake, and here is what it turned out like!
It was so much fun making it! But it took two days...
First day I made the marshmallows, as they had to have time to set overnight, and baked the cake layers too, letting them chill overnight in the fridge, so that it would be easier to cut and handle when assembling the cake. Today I made the filling and frosting, and put everything together.
I used Alton Brown's marshmallow recipe. They are very easy to make, and it is so much fun to be able to make your own colors and shapes! I made one batch, spread it on a 9 by 13 inch pan, and next day I cut them with a cookie cutter. So easy!
I baked 3 batches of regular white sponge cake, this means 6 7 inch pans, leaving one (2 pans) all white, while tinting with food coloring the other two in a vivid red. To make white sponge cake I just replace the egg quantity in my regular vanilla cake recipe, with a same quantity of egg whites only. For the batter recipe, you can check my "Perfect vanilla cake" recipe.
I then cut out the domed upper part of each baked cake, so that it would be perfect straight. Then cut it in two equal layers, using a cake leveler, having now 8 layers of red cake, and 4 of white cake. This tool is very handy when making layered cakes like this. I used only five of the red cake, for symmetry. Also It was dangerous to make the cake taller, it is 8 inches tall as it is, and only 7 inches in diameter!
For filling I used the cream cheese frosting recipe that you can also find in the "Perfect vanilla cake" post.
Placing pieces of parchment paper under the cake helps keep clean the cake stand while frosting it! After finishing frosting gently pull them out and you have a clean stand! This is very helpful especially when using bright colored frosting, like the blue one I used.
I started assembling the cake with a red layer, alternating with a white one, and so on, and finishing with a red layer as well. In between the layers I used a dollop of cream cheese frosting only. Using a large ice cream scoop for picking up the cream ensures you have equal amounts of it between layers. I decided on this filling because it is a little thicker, and would hold better under the weight of the cake. This is a huge cake, about 8 inches tall, so you have to take in consideration it's stability. Having the cake layers chilled also helps a lot. You can also freeze them before, but chilling was enough.
After finishing layering, I covered everything with a Swiss meringue buttercream, because it is a very white cream, so tinting it a bright blue is easier, and gives you a nice color.
Place a dollop of frosting on top, and using an offset spatula crumble coat the cake first. This means putting a thin layer of frosting all over it, so the crumbles won't get in your finishing layer of frosting. After crumble coating it, let it chill in the fridge for 20-30 minutes, then continue with the rest of the frosting.
The recipe for the meringue buttercream:
1 cup egg whites
2 cups granulated sugar
3 sticks softened but cold butter, cut in cubes
1 tablespoon pure Tahitian vanilla extract
small pinch of salt
5 drops of Royal Blue Ateco gel food coloring
Method:
Wipe the clean bowl and whisk attachment of your stand or regular mixer and a hand whisk with a paper towel with vinegar or lemon juice, to make sure you remove all traces of grease.
Put a sauce pan with 2-3 cups of water on heat, and let get to a simmer. Mix the egg whites with sugar in the mixer bowl, and place it over the sauce pan, making sure the bowl does not touch the simmering water bellow. Mix continuously with a whisk, until the egg and sugar mixture gets to 140 degrees F. You can use a candy thermometer. I did not have one, but for this cake went and got one at Sur la Table, for $12. This little gadget is not expensive but it helps you so much in the kitchen, from making candy and marshmallow, to playing with chocolate or getting a perfect steak or turkey!
If you don't have one just heat everything for 6-8 minutes, until all the sugar is melted, and the egg whites are quite warm, but you must be able to touch it, so not very warm.
Place the bowl on the mixer, and let it whip for 5-6 minutes on medium heat, until you get a glossy meringue, and the bowl reaches a neutral temperature to the touch.
Change the whisk with the paddle attachment, and with the mixer on slow, add the butter cubes one by one, until incorporated, and the cream is spreadable. If it is too runny, the butter might have been to warm. Put the bowl in the fridge to cool fo 10-15 minutes, then beat again. If the mixture curdles, keep beating and it will come together. At the end add the vanilla, salt and food coloring. Mix.
Use the frosting immediately. If not you can keep it in the fridge or even freeze it.
After frosting the cake with the blue buttercream, I made a cake topper using my marshmallow stars. I wanted white stars to put on the blue cake, and marshmallows seemed the perfect choice for USA's Independence Day, because they are sooo... American! An explosion of stars on a beautiful blue is what I wanted. I am happy how it turned out!
The red and white striped "stick" holding the largest star is actually a paper beverage straw! ;)
So here you have it, a 9 layers cream cheese frosting filled, red,white and blue, taller than wide cake, covered in blue meringue buttercream and topped with an explosion of homemade marshmallow stars!
Happy 4th of July, everyone!
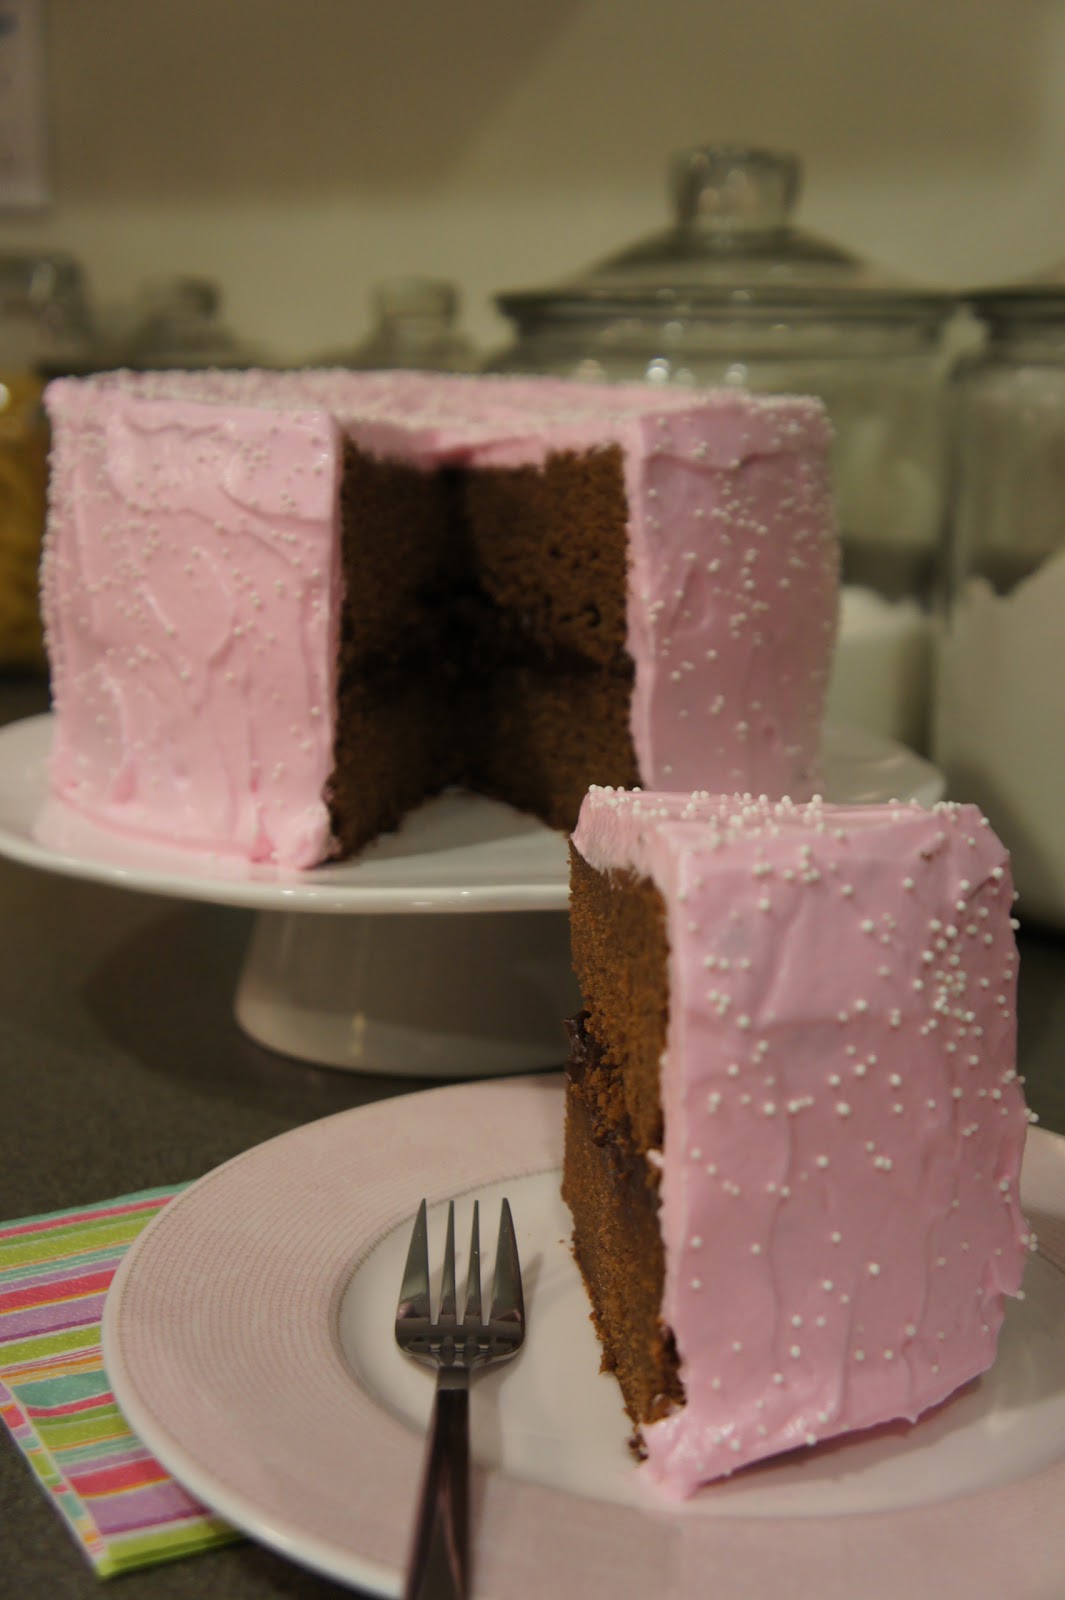
I actually use it more often than I use my gym membership ... this is not good . But it is delicious . And what is it about pink meringue frosting that makes me so happy ?
Chocolate cake with ganache filling and meringue frosting